Sealant Tools 101: How to Seal Aircraft Components Like a Pro
Apr 2nd 2025

Proper sealing of aircraft components is crucial for maintaining structural integrity, preventing leaks and ensuring the safety and performance of the aircraft. As an aircraft mechanic, you'll spend a considerable amount of time sealing various components and checking seals, but having the right tools on hand can make sealing your aircraft easier and less time consuming. To achieve effective seals, aircraft mechanics need the right tools and they need to know the right techniques. Fortunately, SkyGeek is here to help with a comprehensive guide on sealant tools and how you can use them, with our top 7 sealant tools highlighted, so you can seal aircraft components like a professional.
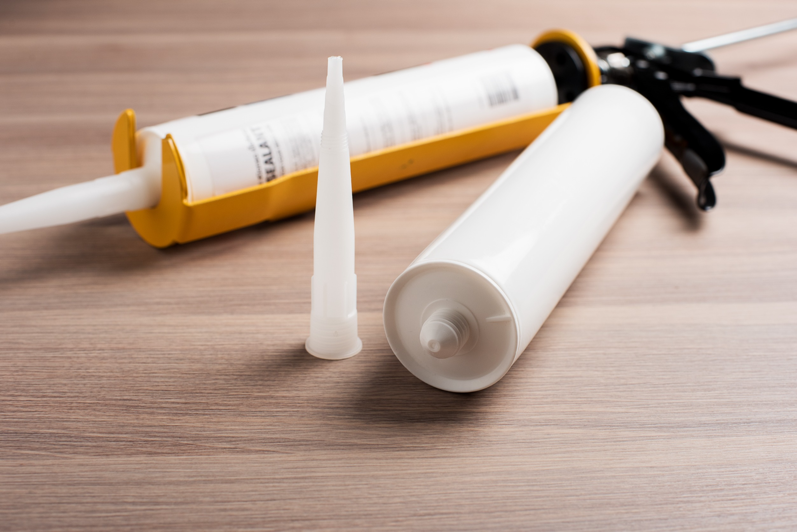
- Caulking Gun
This seems obvious, but a caulking gun or sealant gun is the number 1 essential tool to have on hand for sealing projects. A caulking gun makes it easy to dispense sealants accurately and efficiently. It allows for controlled application and smooth bead formation. Look for a caulking gun with adjustable pressure and a smooth trigger mechanism for better control. Consider the compatibility of the gun with various cartridge sizes and the ease of loading and unloading when choosing the right caulking gun for your needs.
Pro Tip: Look for ergonomic handles to reduce hand fatigue during long sealing sessions and models with automatic pressure release to prevent drips when not in use. This feature helps reduce waste and ensures precise control of the sealant application.
- Sealant Applicator
Sure you have fingers, but a dedicated sealant applicator is a mess-free way to make sure that sealant gets into those tiny cracks and gaps. A sealant applicator, also known as a spatula or spreader, is used for spreading sealant evenly over the surfaces to be sealed, getting in corners and allowing for a perfect seal. It also helps achieve a uniform thickness and smooth finish. Select applicators made of non-reactive materials like plastic or rubber to avoid any chemical reactions with the sealant. Different sizes and shapes of applicators may be required based on the specific area and component being sealed.
Pro Tip: Some applicators are designed with angled heads for better precision in hard-to-reach areas, which is especially useful when working with complex or intricate aircraft parts.
- Sealant Smoothing Tool
Get that smooth, picture-perfect finish by using a sealant smoothing tool. A sealant smoothing tool, often referred to as a squeegee or smoothing stick, is employed to remove excess sealant, create a neat edge, and achieve a professional finish. It helps shape and contour the sealant to conform to the contours of the component, removing any lumps or bumps along the way. Look for a tool with a flexible yet sturdy edge for effective smoothing without damaging the sealant or substrate. Sealant smoothing tools come in different shapes and sizes and are relatively inexpensive, so there's no reason not to splurge on several different ones to make sure you have a nice selection.
Pro Tip: Some models are adjustable, allowing you to switch between various edge profiles, depending on the surface you are working on.
- Sealant Removal Tools
Out with the old and in with the new. A sealant removal tool like a sealant scraper helps do exactly what you would expect - remove old sealant. Sealant removal tools are essential for removing old or damaged sealant before applying a new sealant layer and their unique design quickly scrapes up old sealant out of corners and grooves without scratching the surface. These tools can include plastic or metal scrapers, specialized sealant removal blades, or solvent-based sealant removers. Ensure that the chosen tools are appropriate for the specific sealant material and are gentle enough not to damage the component.
Pro Tip: Some sealant removal tools are designed to work with heat or solvents, making them ideal for hard-to-remove sealant. For large or challenging surfaces, a heated scraper can speed up the process.
- Cleaning and Preparation Tools
Before applying sealant, proper cleaning and preparation of the surfaces are essential. Sealant simply won't stick to dirt, so you've got to remove it all and prepare the surface before sealing. Tools such as brushes, lint-free wipes, solvents and abrasives may be required to remove dirt, grease, old sealant residue and other contaminants. Adhere to the manufacturer's instructions and ensure compatibility between the cleaning agents and the substrate material to prevent any adverse reactions.
Pro Tip: For sensitive surfaces, consider using mild, non-abrasive cleaners to avoid damaging the material beneath. Using a surface prep tool like an abrasive pad or brush can help create a cleaner surface for better adhesion.
- Masking Materials
Sometimes you need to avoid getting sealant where it shouldn't go. Masking materials like tape and masking film are used to protect areas that should not be sealed or that require precise application. These materials help create clean lines and prevent unintentional sealant smears or spills. Choose high-quality masking materials that are resistant to the sealant and do not leave residue upon removal to get those crisp, clean lines you crave.
Pro Tip: Some masking tapes are designed with specific adhesion levels to prevent damage to delicate components while offering maximum precision. For ultimate control, look for masking films with low adhesive strength, which are easier to remove without leaving residue.
- Inspection Lighting
Makes sure you can see what you're doing by investing in some lighting. Proper lighting is essential during the sealing process to ensure that all areas are adequately sealed and to detect any imperfections or voids. Use inspection lighting tools such as handheld LED lights or portable light panels to illuminate the work area effectively. LED lights are bright, cool to the touch and easy to direct. Adequate lighting will help you identify any areas that require additional sealing or touch-ups while you work.
Pro Tip: Look for models with adjustable brightness levels to accommodate various lighting conditions. A flexible, adjustable LED light is especially useful for directing light into tight or difficult-to-see spots.
Conclusion
Sealing aircraft components requires precision, attention to detail and the right tools. By understanding the purpose and proper usage of sealant tools like caulking guns, applicators, smoothing tools, removal tools, cleaning tools, masking materials and inspection lighting, you can achieve professional-level seals. Remember to select tools that are compatible with the specific sealant material and substrate, and follow manufacturer guidelines for sealant application. Having the right sealing tools will not only improve efficiency but also ensure that you achieve high-quality, durable seals that maintain the safety and performance of the aircraft. With the right tools and techniques, you can ensure reliable seals, protect against leaks and maintain the structural integrity of aircraft components. Investing in quality sealant tools also increases the overall reliability of the aircraft, reducing maintenance costs and the likelihood of repairs due to sealant failure.